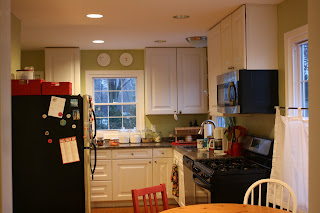
When we bought our house (in November of 2009), our kitchen was exactly what we wanted - hard wood floors, white cabinets and stainless steel appliances. Of course, when you are buying your first house it is hard to know exactly how much all of those big cabinets will actually hold - I would never have imagined we didn't have enough cabinet space. After about a year, we realized we needed a dedicated space for food storage. In doing so, we hoped to free up some cabinet space.
 |
| Our kitchen soon after we moved in |
 |
| A living room closet was closed off and made into an opening for the refrigerator by previous owners |
 |
| We didn't mind the refrigerator where it was, but it completely eliminated the kitchen work triangle and the refrigerator was such a snug fit, the door dug into the wall every time we opened the refrigerator |
 |
| Pierre has such great ideas: he realized we had plenty of room on the wall across from our stove/oven for our refrigerator (which would also establish a work triangle), so we moved it out of this too small home and Voila! the perfect space for a built-in pantry |
Pierre designed the space and asked a friend to help install a new door and drywall to close in the wall opening. We had a few "mystery" switches in our kitchen and he asked how to re-use one for the pantry at the same time. Since we knew we would have to paint the new drywall, we decided to take the opportunity to paint the kitchen.
 |
| Sample paint color and brand new pantry door |
 |
| Newly painted kitchen and finished pantry |
 |
| The pantry got a coat of paint and a "new" light fixture my dad had lying around |
 |
| A wall mounted pot rack saves a lot of cabinet space too |
 |
| We used Elfa from the Container Store - they have a free design service which helped us get the most use out of our space |
 |
| An over the door unit keeps small things like spices at easy access |


